安装WSL环境+VSCode
撰写时间: 2020-03-30 总共: 1450 字 转载请注明: BY-SA 4.0(除特别声明或转载文章外)
前言
为进行毕设环境搭建,所选择的Linux子系统为Ubuntu18.04。
编辑器使用VSCode
打开子系统功能
点击系统徽标旁的搜索,进行搜索:Windows功能。
打开勾选上适用于Linux的Windows子系统。
如下图:
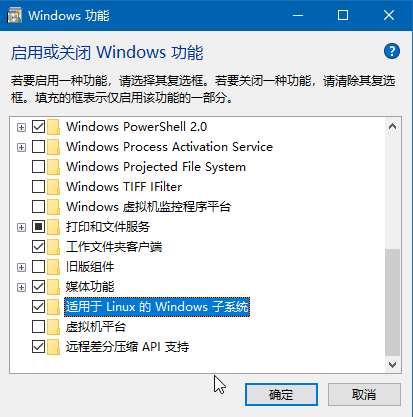
稍后重启。
在应用商店下载Ubuntu
搜索安装该Ubuntu系统。

安装完成后点击打开。
打开后会使用几分钟的时间进行该系统的安装。
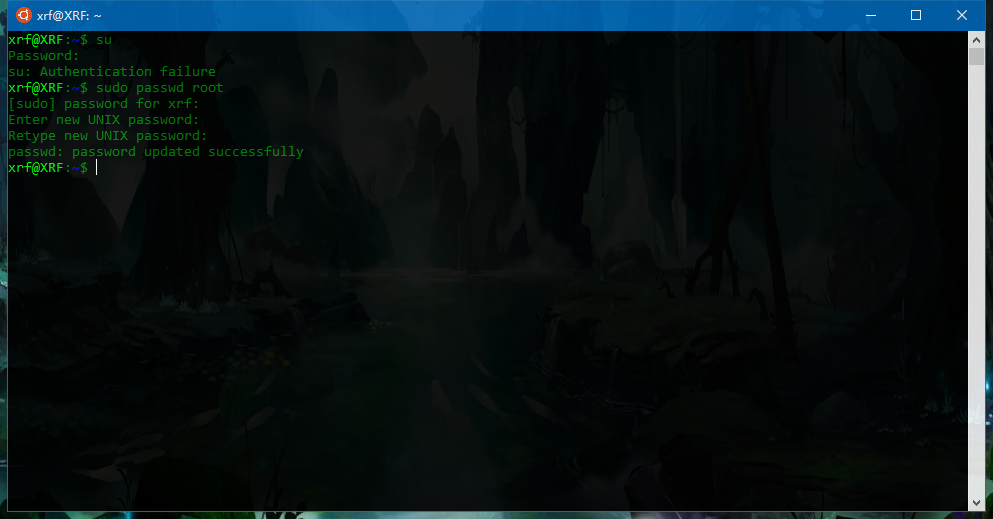
Ubuntu系统更新
安装完成后我们设置一下root的密码。
sudo passwd root
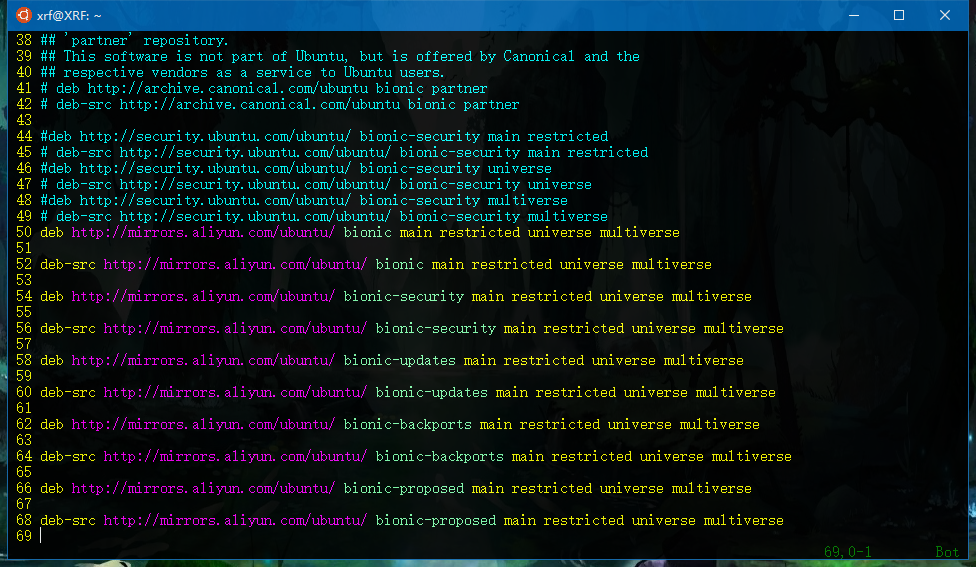
再进行更换Ubuntu下载源为国内源。
首先打开源文件。
sudo vim /etc/apt/sources.list
先把打开的文件将所有没有注释掉的都注释掉先。
在将下面的复制进去。
这里有个小设置,右键点击命令行窗口打开属性,将允许ctrl+shift+v进行复制粘贴勾上。
deb http://mirrors.aliyun.com/ubuntu/ bionic main restricted universe multiverse

deb-src http://mirrors.aliyun.com/ubuntu/ bionic main restricted universe multiverse

deb http://mirrors.aliyun.com/ubuntu/ bionic-security main restricted universe multiverse

deb-src http://mirrors.aliyun.com/ubuntu/ bionic-security main restricted universe multiverse

deb http://mirrors.aliyun.com/ubuntu/ bionic-updates main restricted universe multiverse

deb-src http://mirrors.aliyun.com/ubuntu/ bionic-updates main restricted universe multiverse

deb http://mirrors.aliyun.com/ubuntu/ bionic-backports main restricted universe multiverse

deb-src http://mirrors.aliyun.com/ubuntu/ bionic-backports main restricted universe multiverse

deb http://mirrors.aliyun.com/ubuntu/ bionic-proposed main restricted universe multiverse

deb-src http://mirrors.aliyun.com/ubuntu/ bionic-proposed main restricted universe multiverse
完成后如下:
然后进行一下软件更新啥的。
sudo apt-get update
sudo apt-get upgrade
等待完成即可。
使用VSCode
首先安装这个Remote-WSL。
其实VSCode在你打开的时候,会提示你的系统拥有WSL会建议你进行安装这个扩展进行连接你的子系统的。然后你就可以使用自带的终端进行文件什么的操作了。
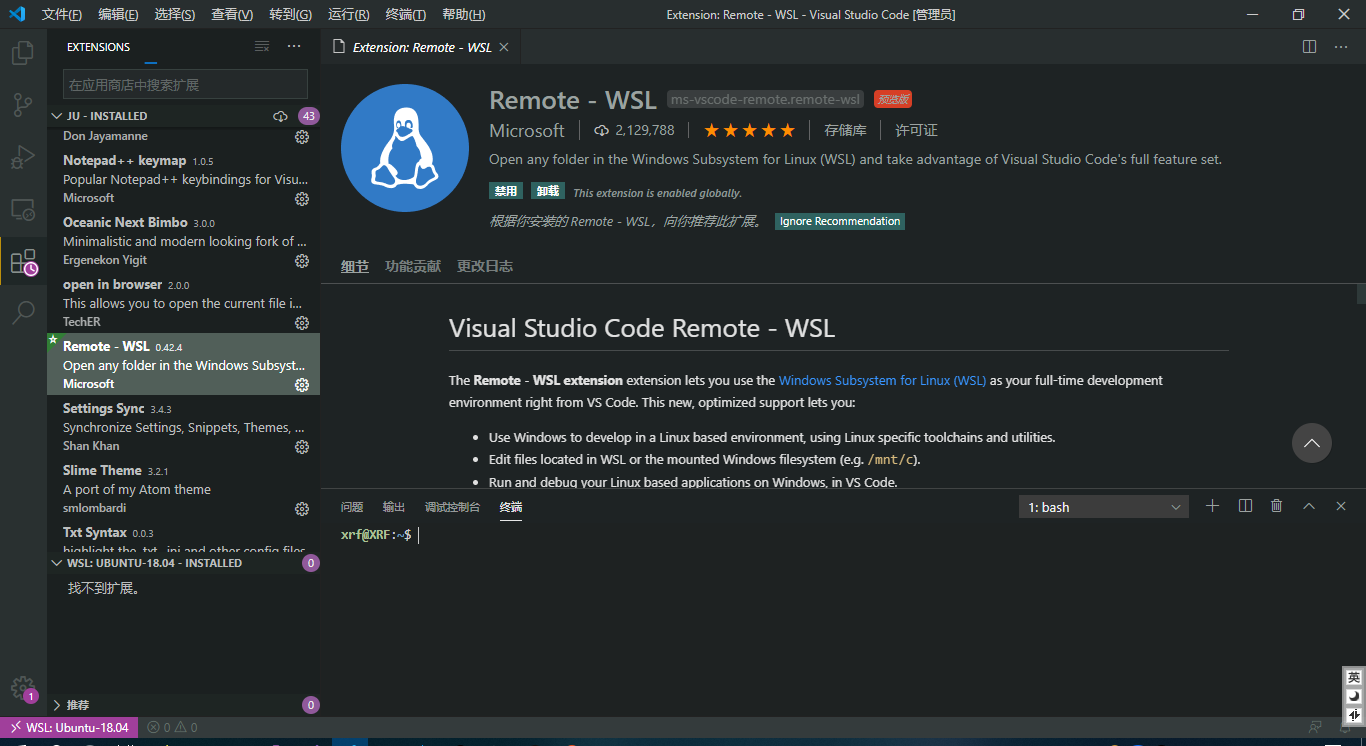
当然,在你使用的时候会提示你原来的某些位于Windows上的扩展没有在该子系统上,你需要将这个扩展安装到子系统上。
打开某个文件夹的时候你可以在这里打开该文件夹位于文件资源管理器的哪里
(PS:方便进行文件的复制跟粘贴)